Click on any thumbnail image below


|
Click on any thumbnail image below |
|
|
Oct. 16, 2005. One last thing. I stained my trash corral to match the house |
|
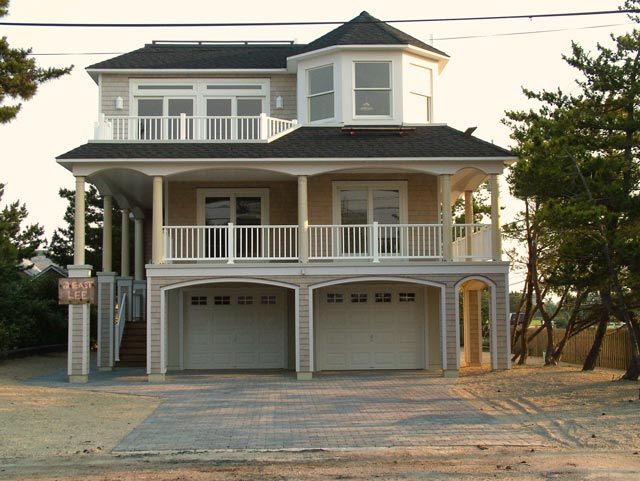
Aug. 30. The exterior finishing phase was officially declared complete today. |
|
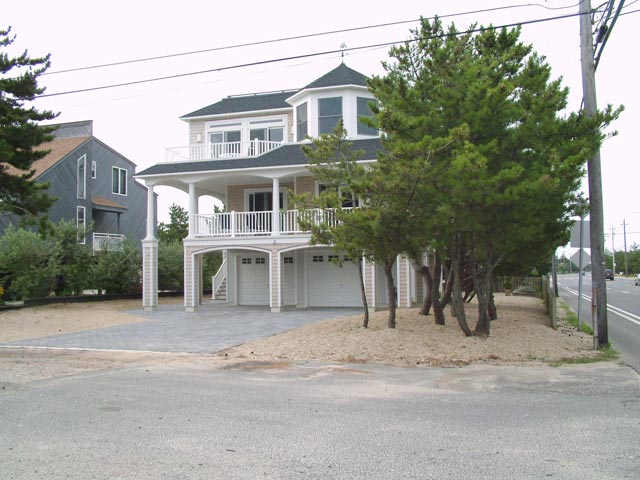
Aug. 30. It will probably never look better than it does now. |
|
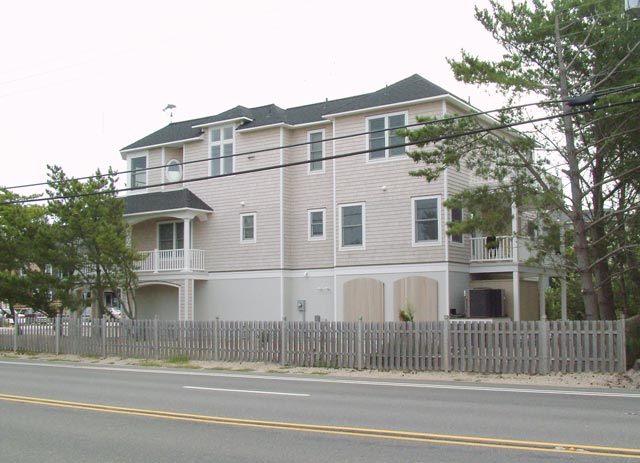
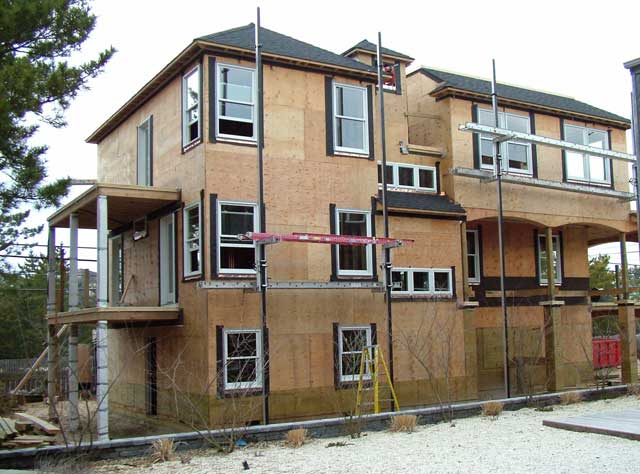
Aug. 30. The finished west side. |
|
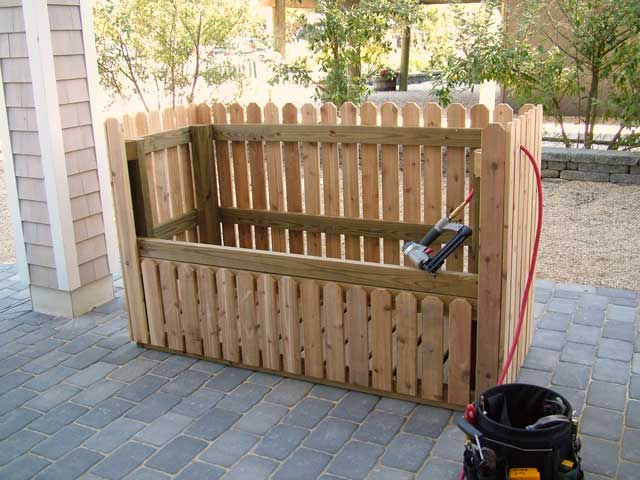
Aug. 25. I got around to cladding the trash can corral with the cedar pickets that I cut months ago. The Porter Cable air nailer has now paid for itself in time saved. |
|
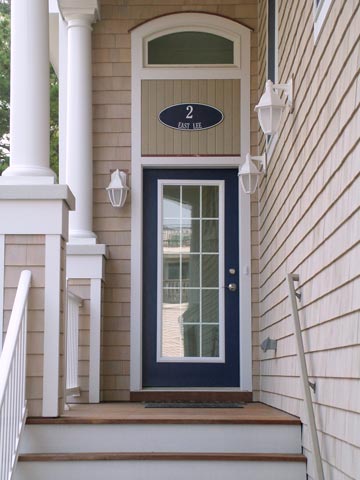
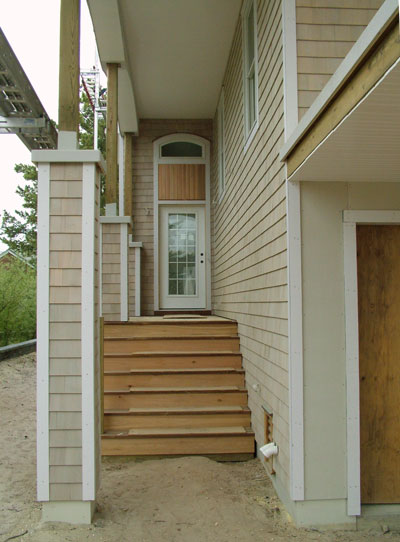
Aug. 12. Do we know how to make an entrance? Actually, we don't- without a lot of help. Cindy picked the color, Ben Moore Symphony Blue, for the door and the plaque. |
|
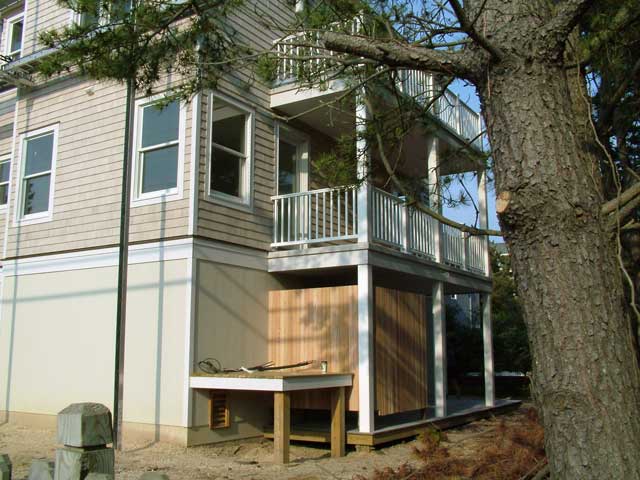
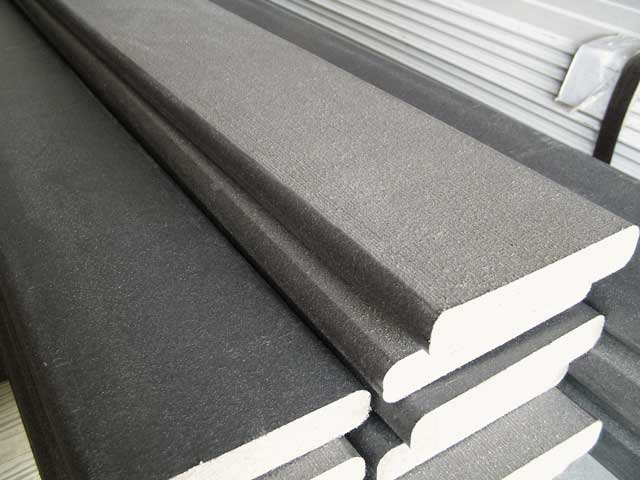
Aug. 7. The red cedar "architectural flourishes" are painted with bleaching oil and installed over the cement board paneling on the lower level. They add some interest... I think. |
|
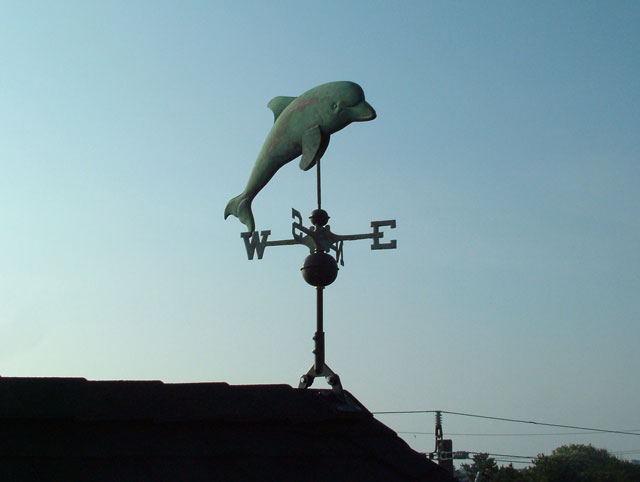
July 27. On the next morning the weathervane greeted the new sunrise, but the dolphin seemed to always point east. I had to go back up and grease the bearing. Now he's a full-function dolphin. |
|
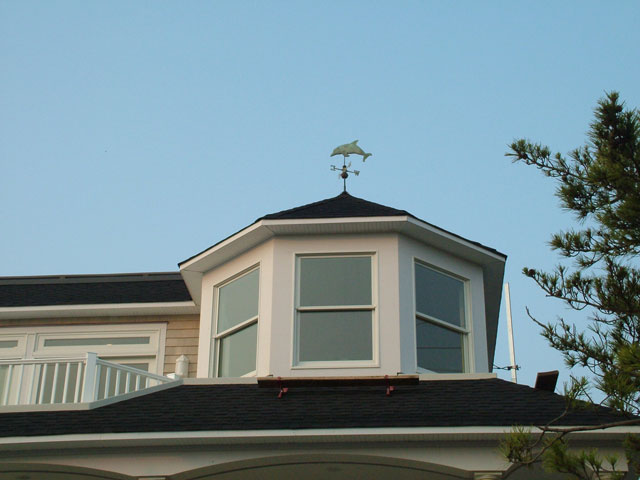
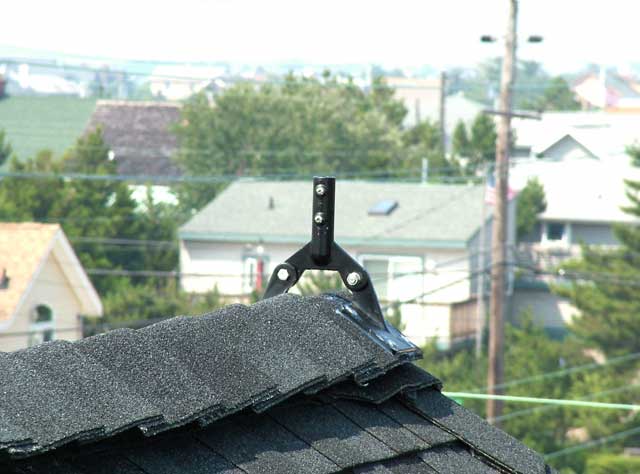
July 26. Defying Jayne's dire warnings, I placed the weathervane on the bracket. I bought the vane a year ago, but only now is it in it's intended place. It was worth the wait. |
|
July 22. Jeff mounted the weathervane bracket to the peak of the turret roof. The lag bolts had to reach through the hollow ABS plastic ridge vent. Still, it seems solid enough. |
|
July 20. We passed our final building inspection today. Jayne will want a better address plaque (note temporary one in photo- ha!). Other hurdles remain, like the dumbwaiter permit. |
|
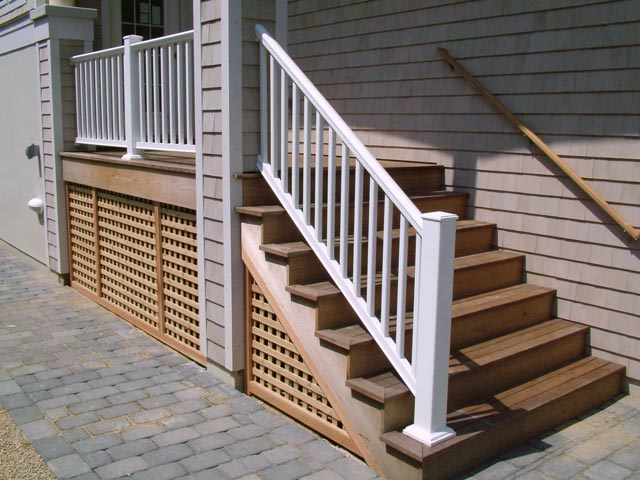
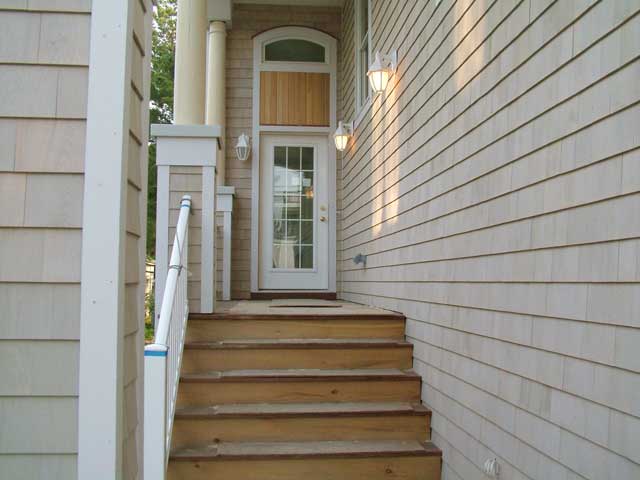
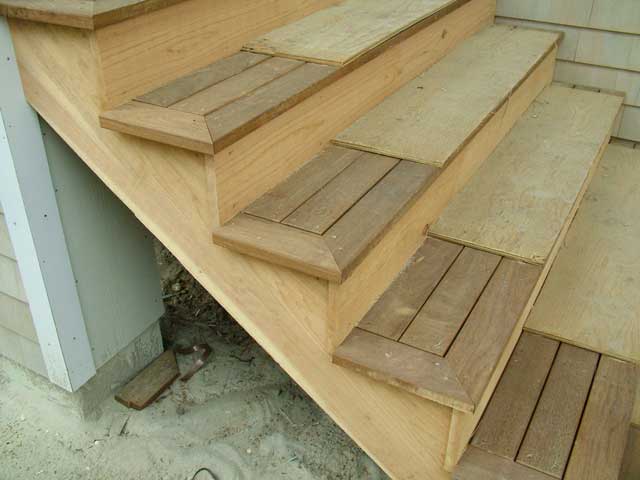
July 20. Several new elements come together at the entry stairs: pavers, railings, cedar lattice and the ipé steps |
|
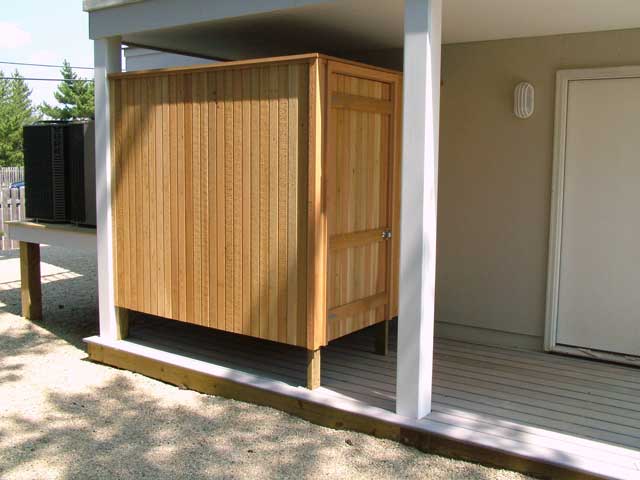
July 20. The outside shower is complete. I am still undecided whether to stain it or let it weather naturally. |
|
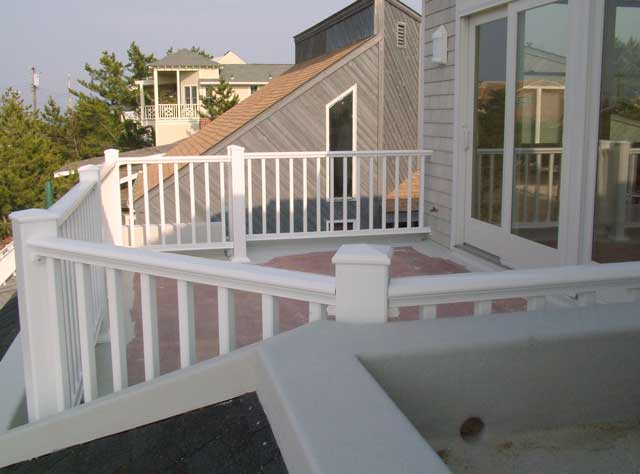
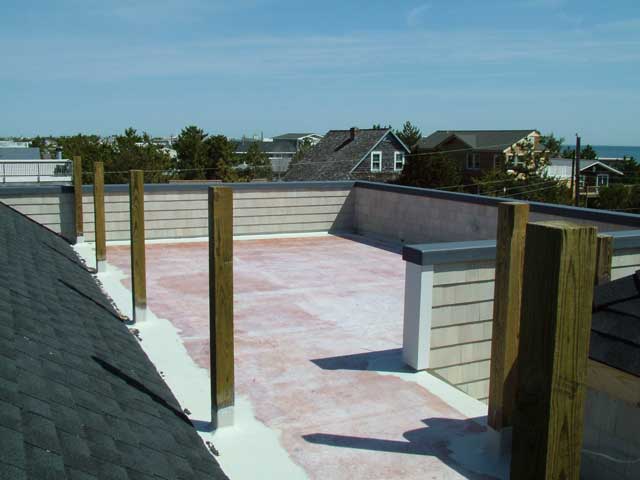
July 20. Jeff added the perimeter rail to the roof deck. I kept the color dull (Trex) to help conceal it from street level. I plan to rebuild it later to push it further inward and hide it from the street. |
|
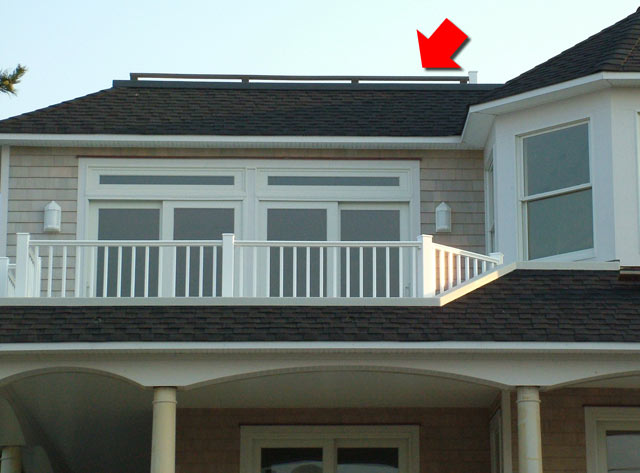
July 20. We always knew that town code requires a higher rail around the perimeter of the roof deck. Still, I don't like what it does to the roof lines (arrow). |
|
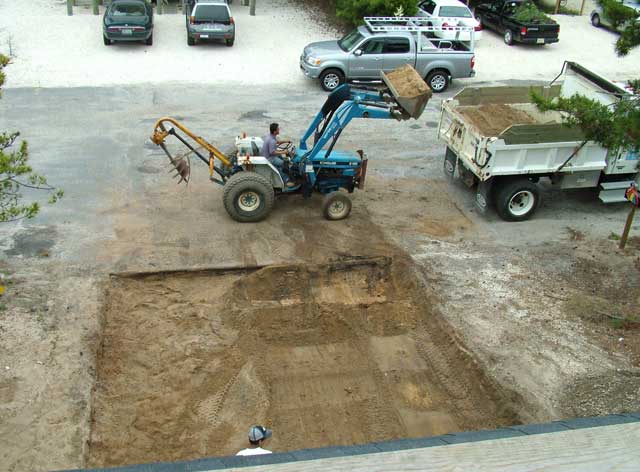
July 8. Work has started on the pavers. First the old gravel driveway is excavated and the new base material is spread. My paver plan is here (from Plans section) |
|
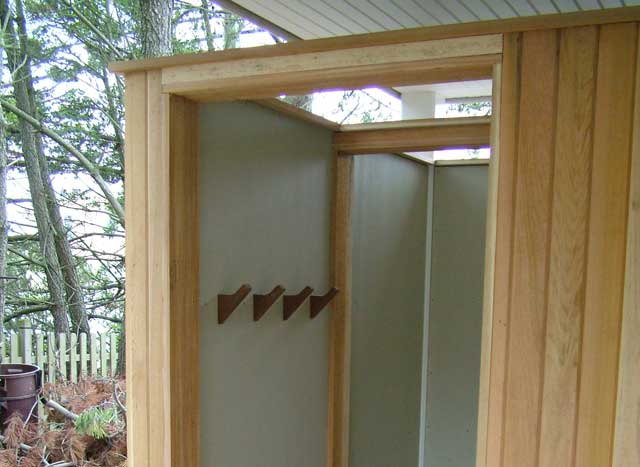
July 8. Talk about details. Clothing hooks are fashioned out of ipé left over from the entry stairs. |
|
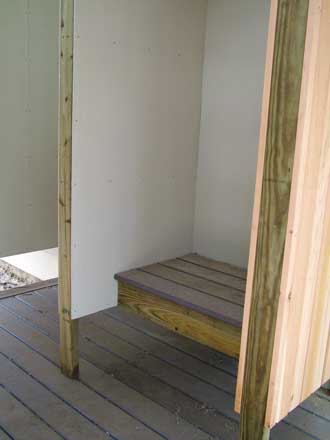
June 30. Mike has finished the outside shower enclosure. The bench is covered with TimberTech boards left over from the deck. |
|
June 24. The main entry now has railings and lights. |
|
June 24. Mike has added the tongue & groove red cedar to the outside shower stall/changing room. I am not sure whether I will stain this or leave it natural. |
|
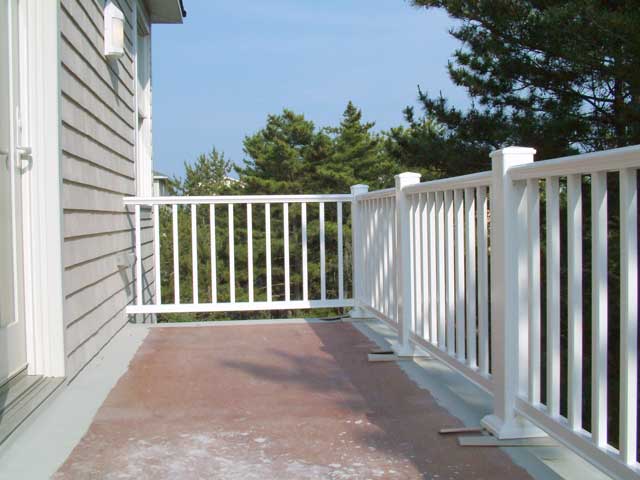
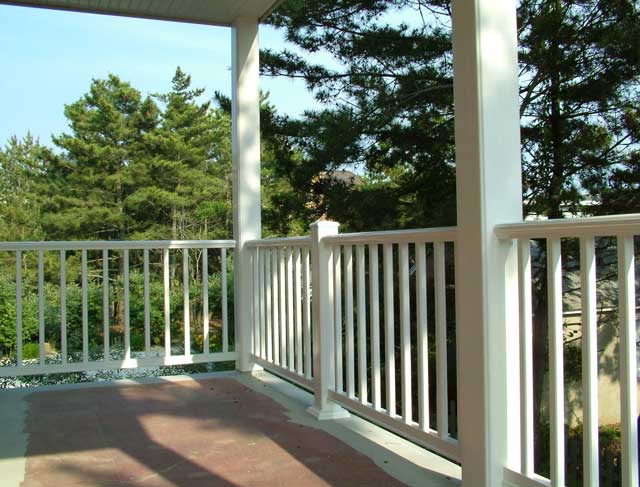
June 24. Here is the WeatherBest railing on the 2nd floor front deck. Despite the steep installation learning curve, the finished product is very, very solid. |
|
June 24. Here is the WeatherBest railing on the 2nd floor rear deck. |
|
June 24. After much debate regarding the best fastening hardware from a metalurgical standpoint, the WeatherBest railings are installed. This one is on the 1st floor rear deck. |
|
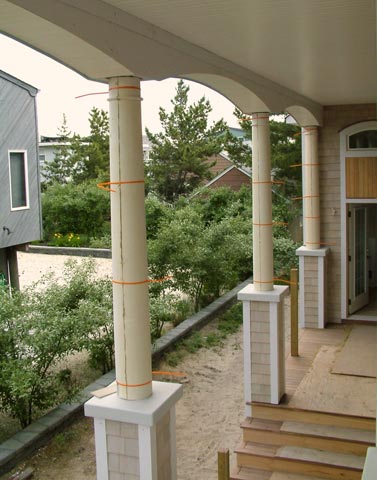
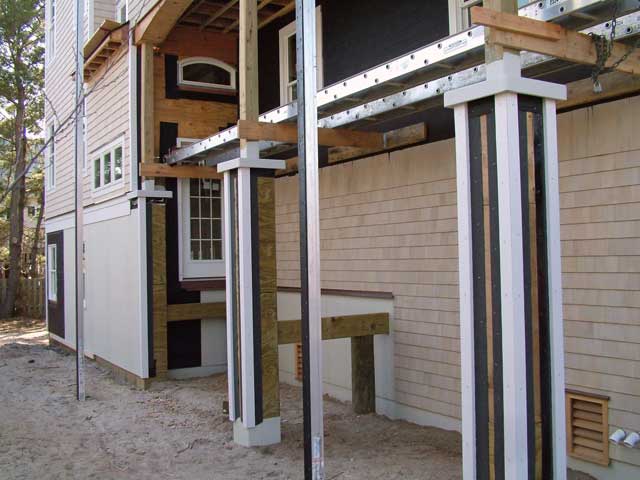
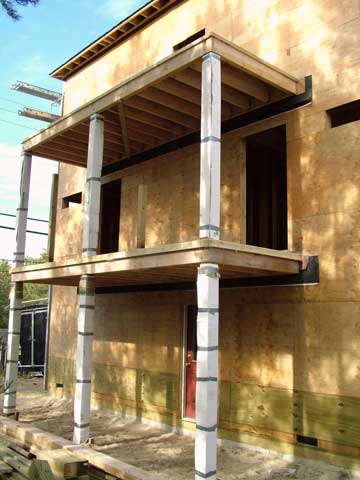
June 20. The two halves of each column are caulked and strapped together while the adhesive dries. |
|
June 20. The Fishers are assembling the split fiberglass columns around the 6x6 timber supports. |
|
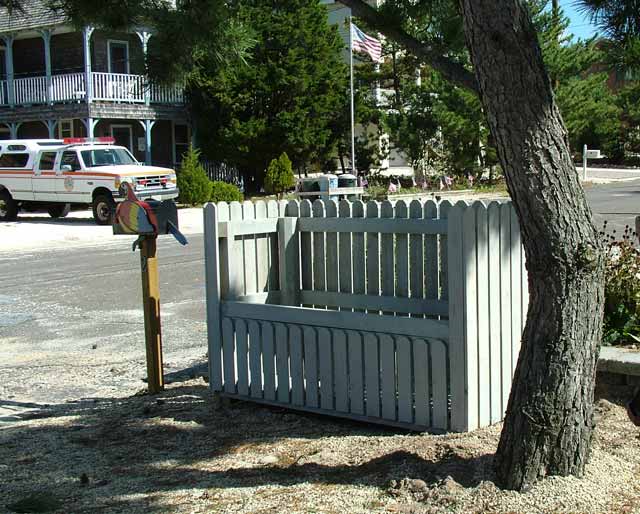
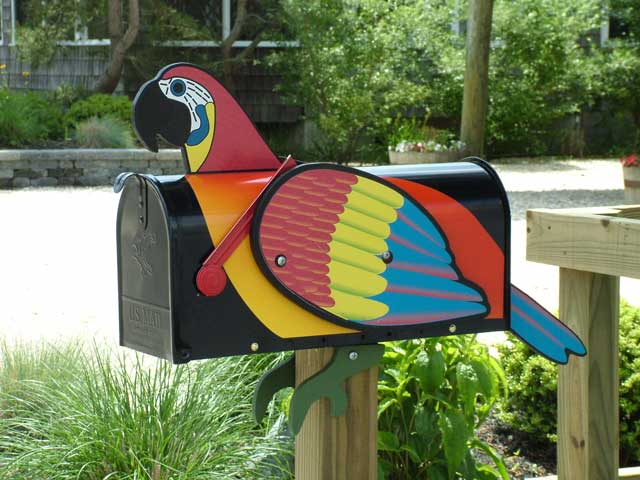
June 17. THE PARROT IS BACK, making his first appearance since last seen at the old house and in his earlier, original version. He spent the winter at our rental storage unit and now sits on a new perch. |
|
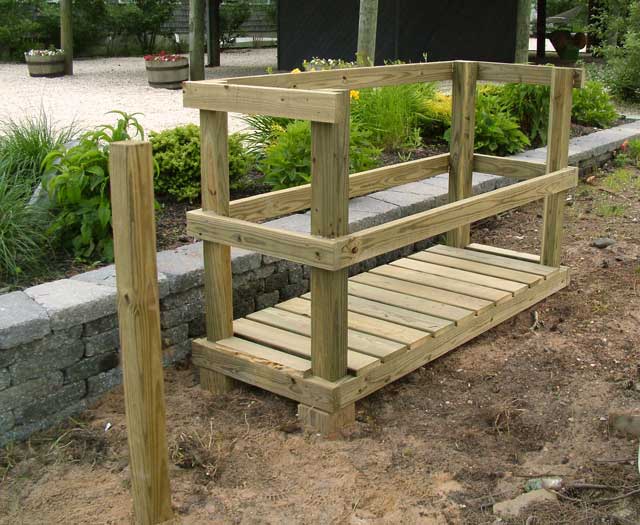
June 16. I set the footings and deployed the trash corral. The fence pickets will be added on later. I set the mailbox post in front of the corral. |
|
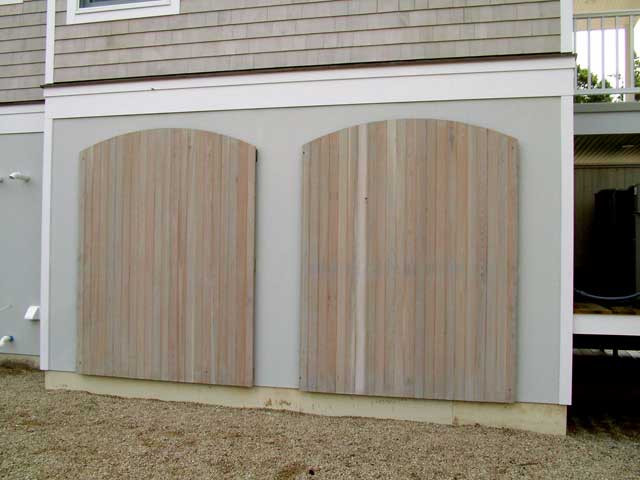
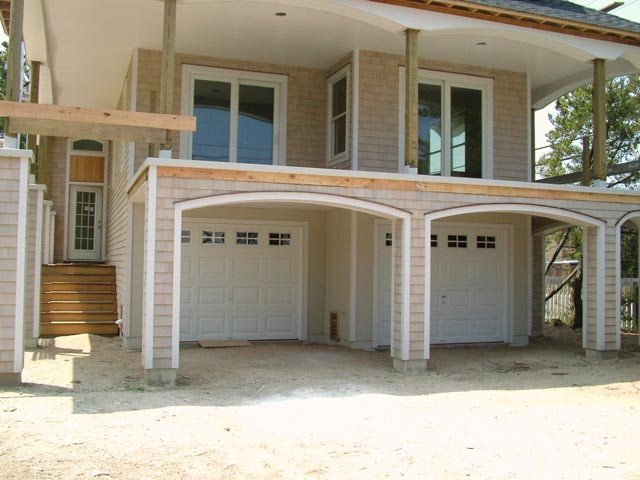
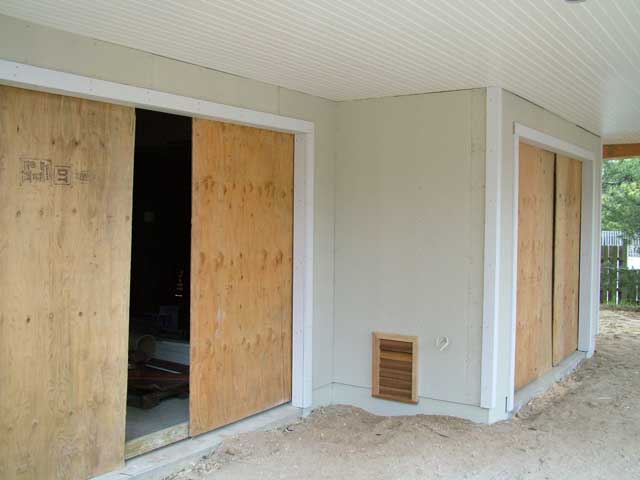
June 11. The Clopay garage doors were installed last week. These steel doors are the only ones that pass the hurricane standards without modification. Will they rust? |
|
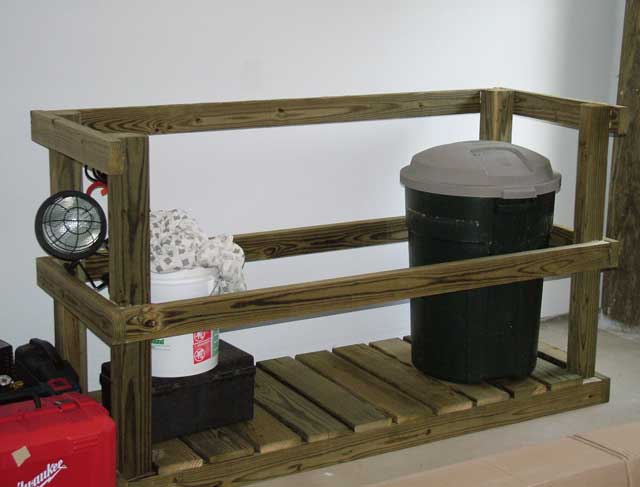
June 7. The trash corral is now functional enough to satisfy town requirements. I plan to cover the frame w/ cedar pickets later. |
|
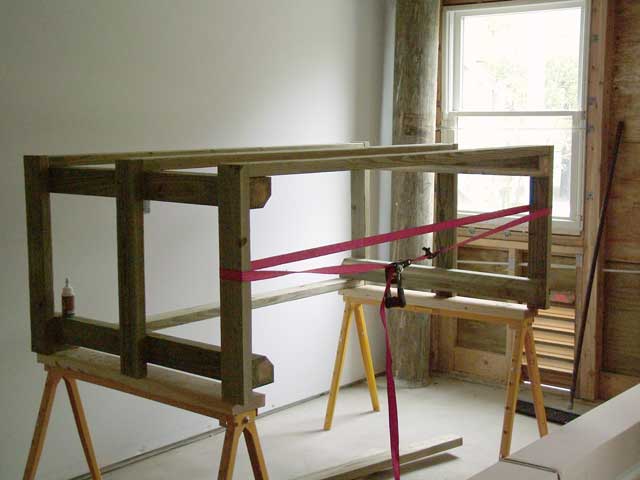
June 6. I am building the trash corral in the lower level back room. The town has specific limits on the dimensions. |
|
May 19. The tropical ipé picked for the entry steps is so dense that it sinks in water (not that I expect test that!). |
|
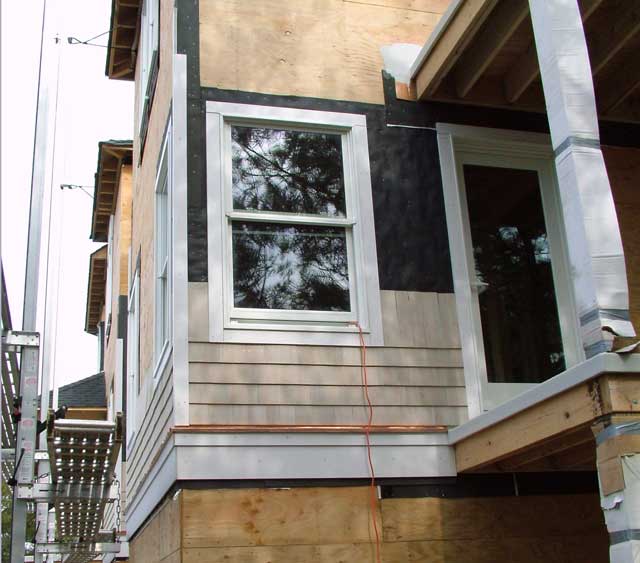
May 19. The front entry now has the tongue & groove red cedar above the door and the ipé deck & stairs. |
|
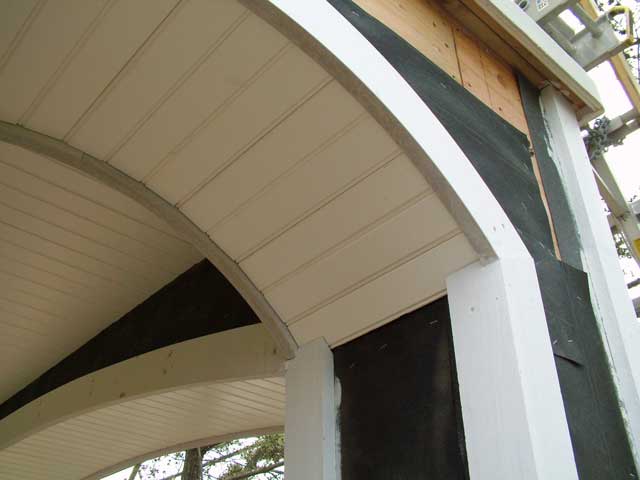
May 19. A close view of the front arches shows how the Azek composite beadboards were used here. Very nice. |
|
May 19. The front arches have been almost completely finished. Cutting the curves in the 3/4 inch cement board has been difficult. |
|
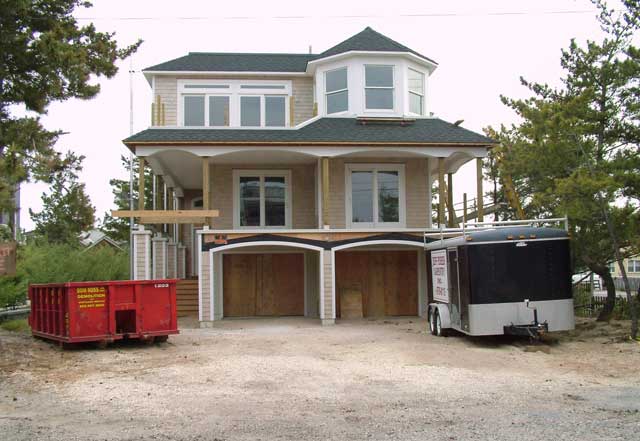
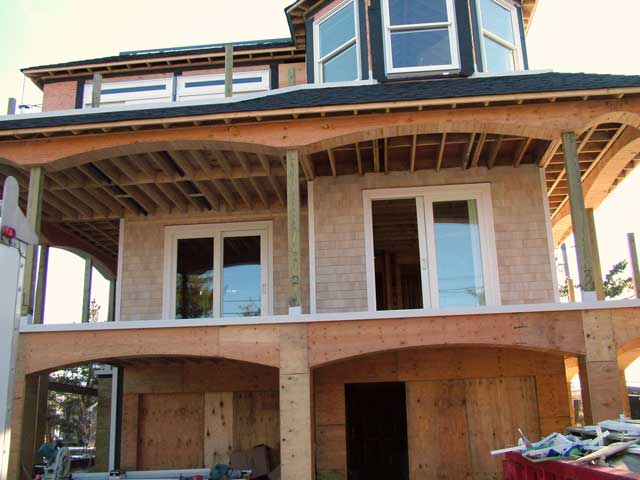
May 19. The front exterior is lacking only garage doors, fiberglass columns, railings and some arch trim to be complete. |
|
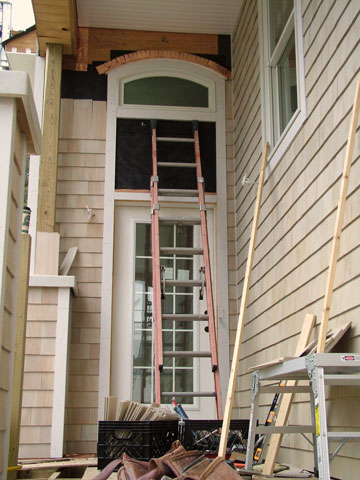
May 5. The trim surrounding the front entry is in place. The blank space at center will get T&G cedar and the address plaque. |
|
May 5. The trailer has been moved for digging the utilities trench tomorrow. |
|
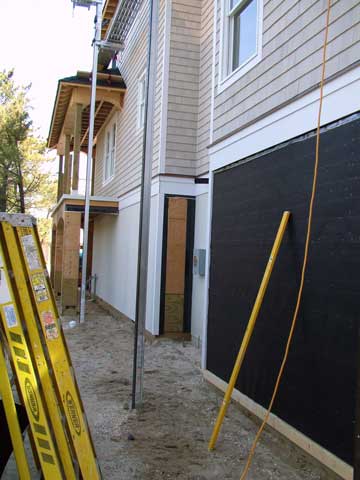
May 5. Cement board panels are on the lower level front side. I've ordered the garage doors, but they will be a few weeks in delivery. |
|
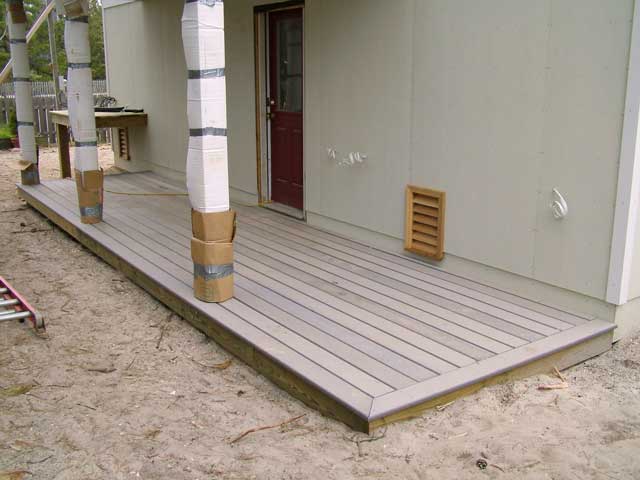
May 5. The composite planks have been screwed down on the rear walkway. |
|
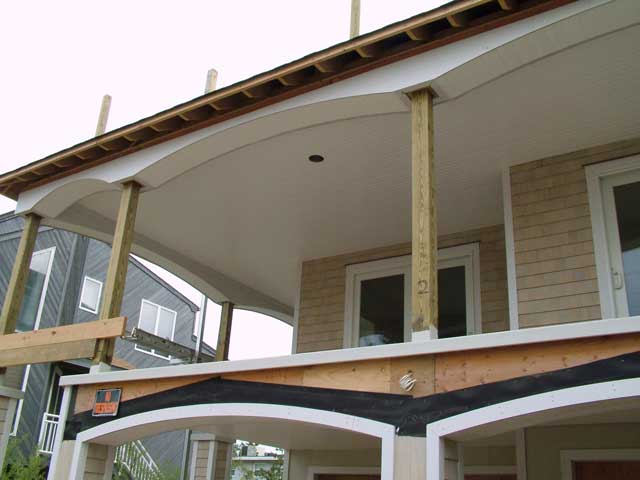
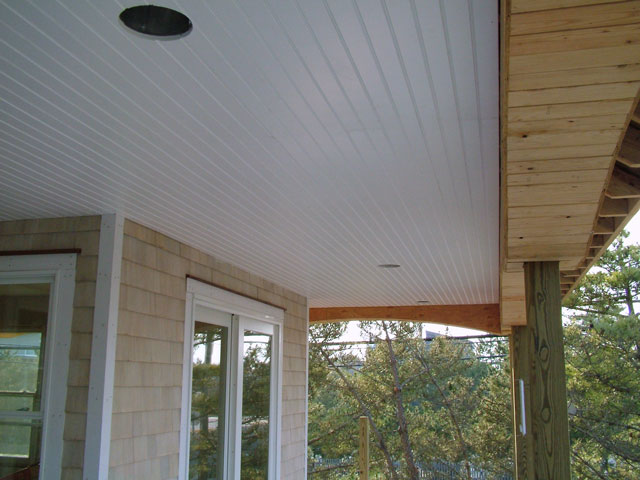
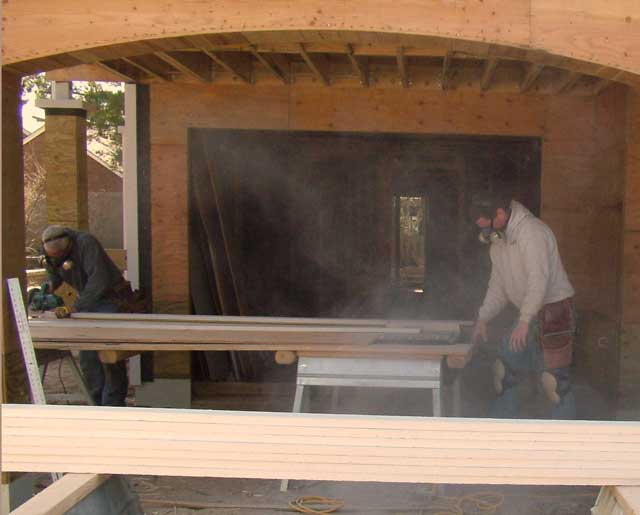
Apr 20. I hope that the finished beadboard proves to be worth the effort. Comments are welcomed. |
|
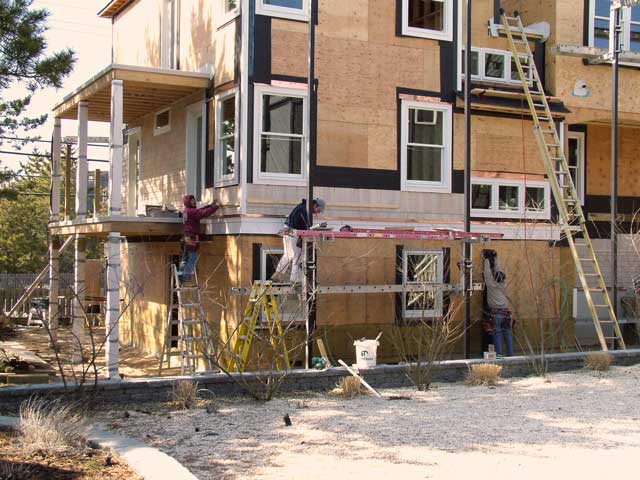
Apr 20. It takes 4 people to install the deck soffits. Two at ground level cut the beadboard and 2 above fit & nail. Everyone is measuring and calling out lengths. It takes lots of time. |
|
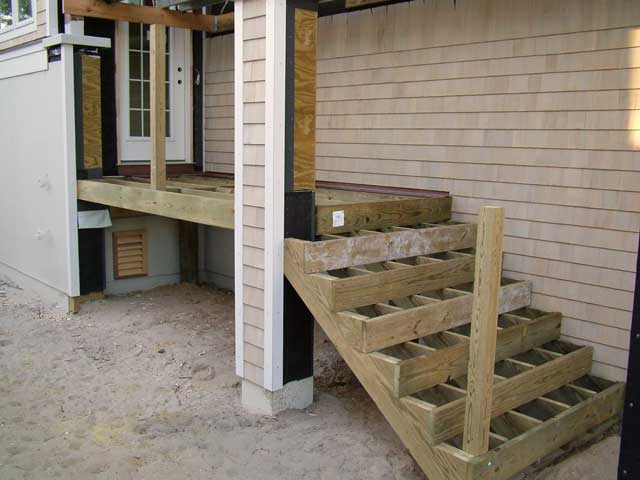
Apr 19. Jeff has also put in the platform and stringers for the entry. The deck & steps will be made of tropical ipé with red cedar risers. |
|
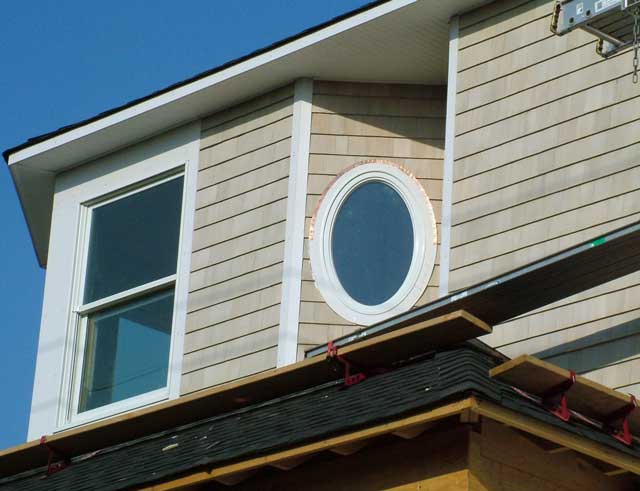
Apr 19. Jeff has finished the oval window trim. Note the copper drip flashing, still shiny at this stage. |
|
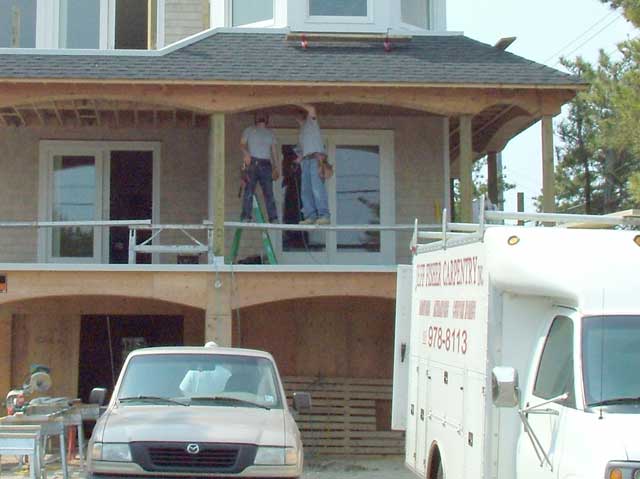
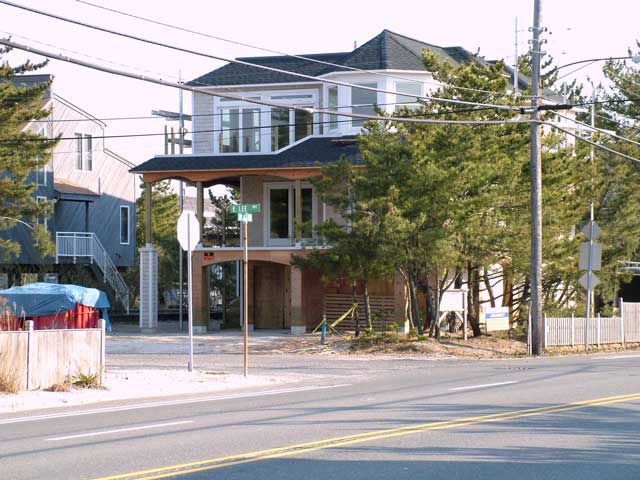
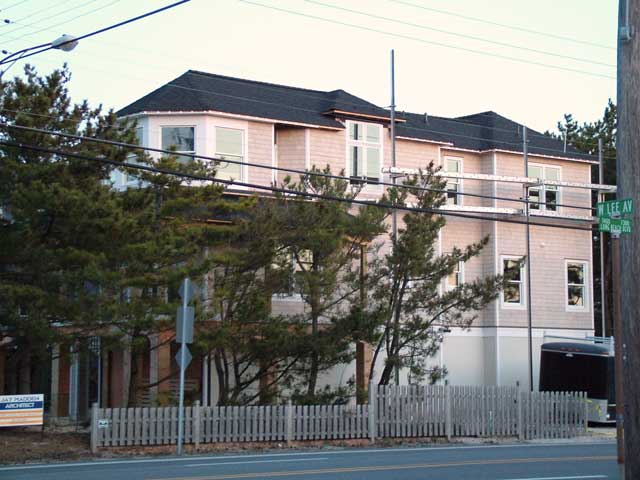
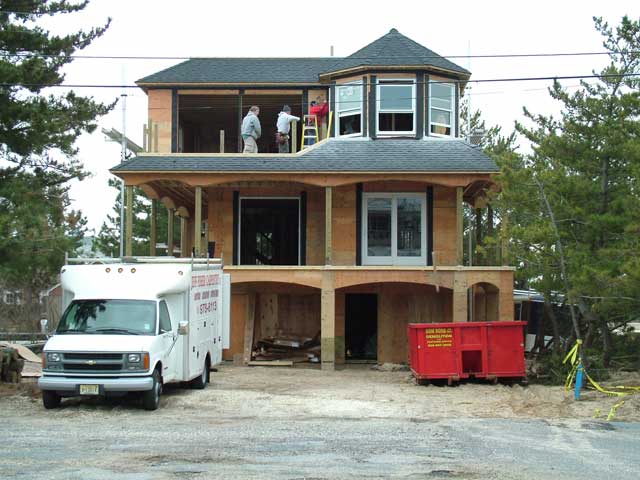
Apr 19. The view from up the Boulevard shapes up... |
|
Apr 19. ...and also the view from across the Boulevard. |
|
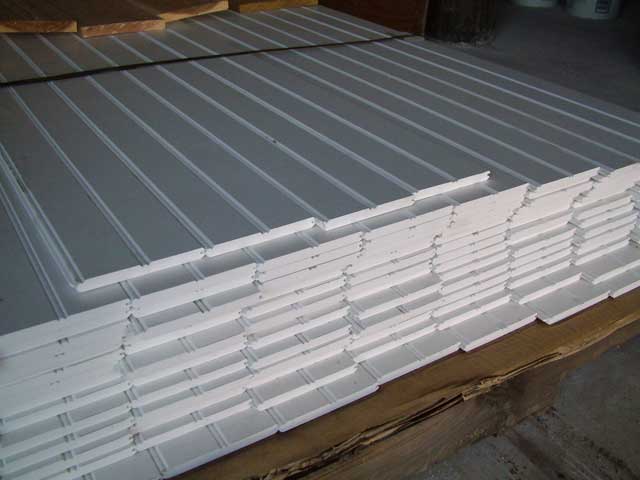
Apr 19. Also in today's delivery: Azek composite beadboards for the deck soffits. These are much heavier and stronger than the CertainTeed material used under the roof overhangs. |
|
Apr 19. We received the composite TimberTech planks for the rear boardwalk. They will be installed with the rough "brushed" side up (right). |
|
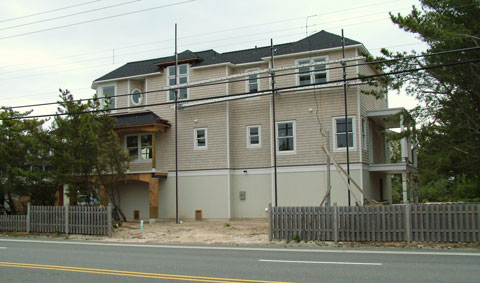
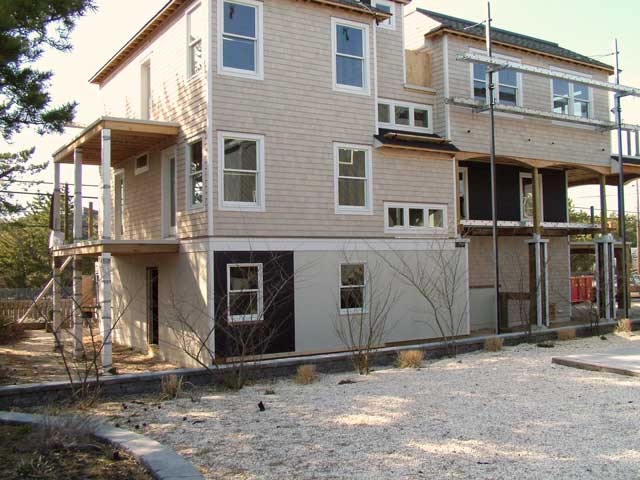
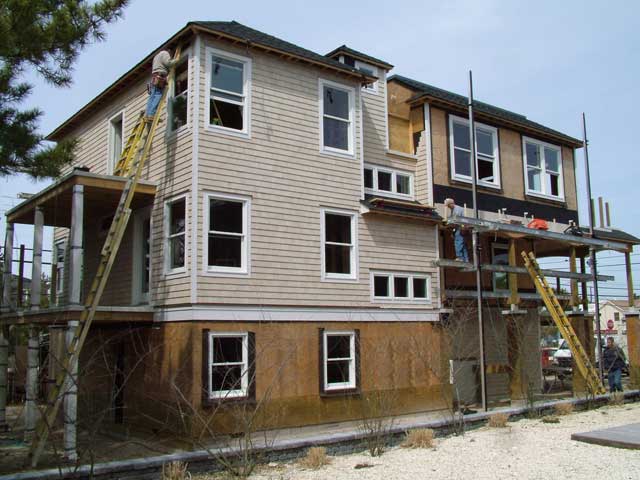
Apr 14. The west side takes on a pink glow at sunset. |
|
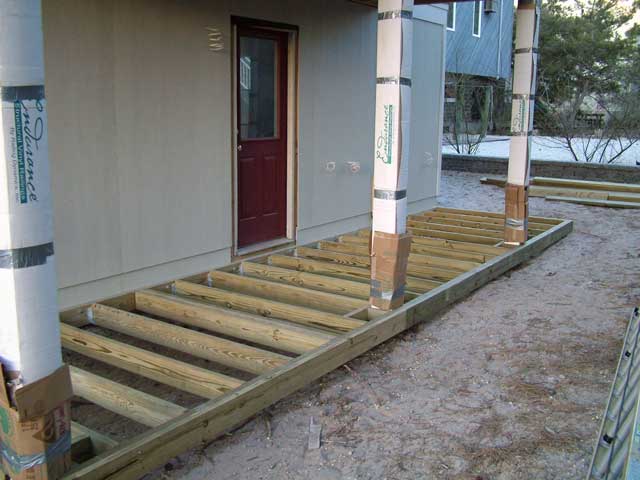
Apr 14. Jeff has layed out the rear outdoor shower and boardwalk platform. The surface will be Trex or TimberTech wood/plastic composite. |
|
Apr 14. I decided to use only the Harditrim cement board for the turret trim. It is still difficult to cut, but the results look good and it should stand up well to the weather. |
|
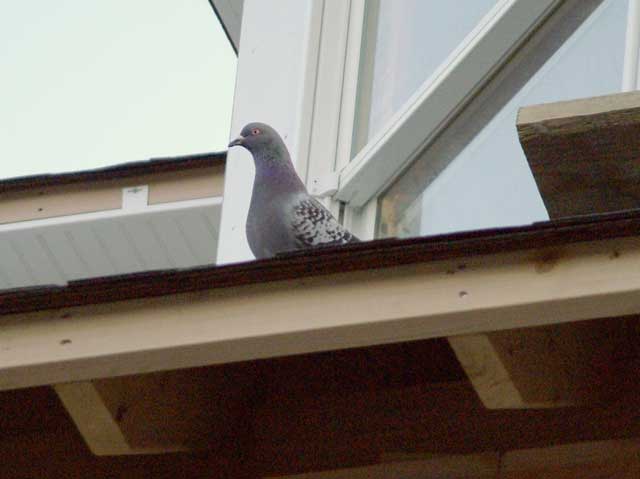
Apr 14. Pigeons nested in the overhangs while the rafters were exposed. They're acting pretty angry now as the soffit goes on. |
|
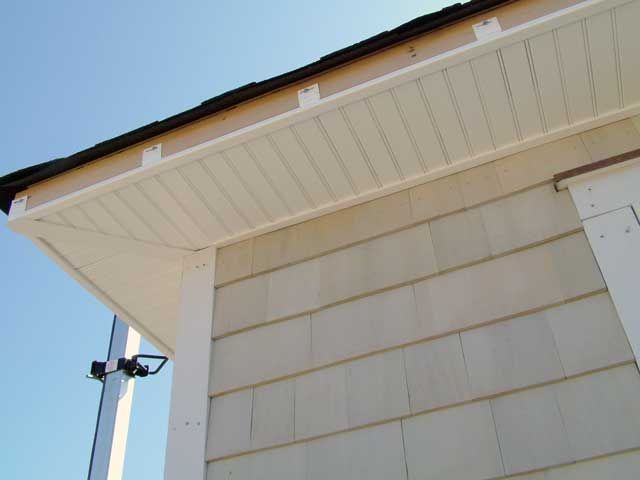
Apr 14. The thin-wall CertainTeed soffit for the roof overhangs is one of our few concessions to vinyl, but it looks like a good choice for this problem-prone area. |
|
Apr 9. The last of the siding panels go into place. Note the chalk line grid on the panels. More cement board will be used to clad the arches. |
|
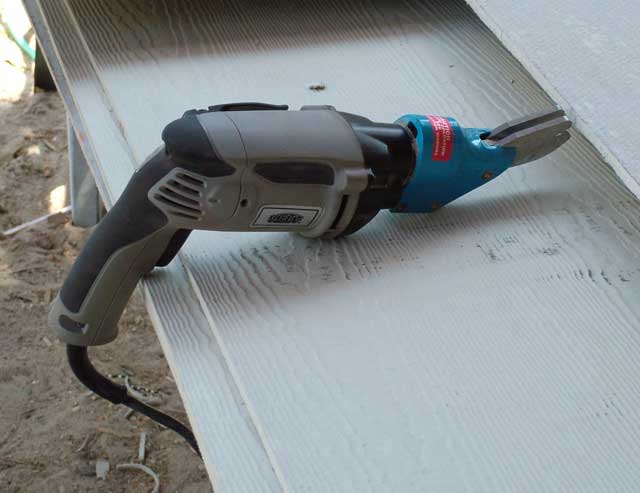
Apr 9. These electric cutting shears do a good, dustless job on the 1/4" cement board panels, but can't handle the thicker trim boards. |
|
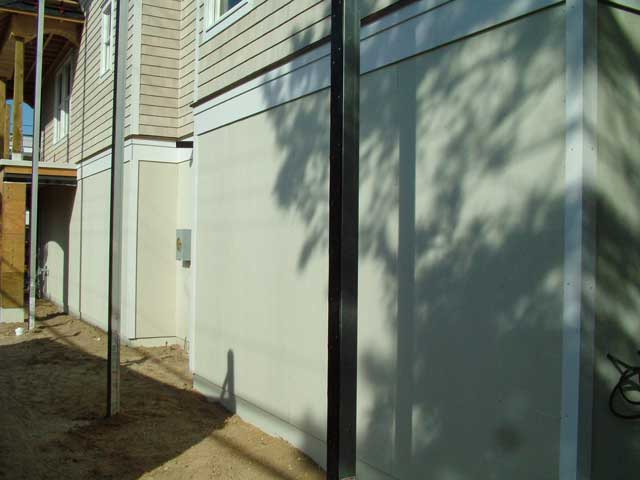
Apr 6. The west side lower level panels and corner boards are complete. I've located the cable & phone entry boxes below and to the right of the electric meter. |
|
Apr 6. We ended up short by a few cement panels for the lower level. Some are also needed for the arches' cladding. More are on the way. |
|
Apr 6. The corner boards on the square pillars are also made from cement board. Each is made from two boards that have been mitered. |
|
Apr 6. One of the issues with the cement boards and panels is the copious dust created when it is cut. Dust masks are required.. |
|
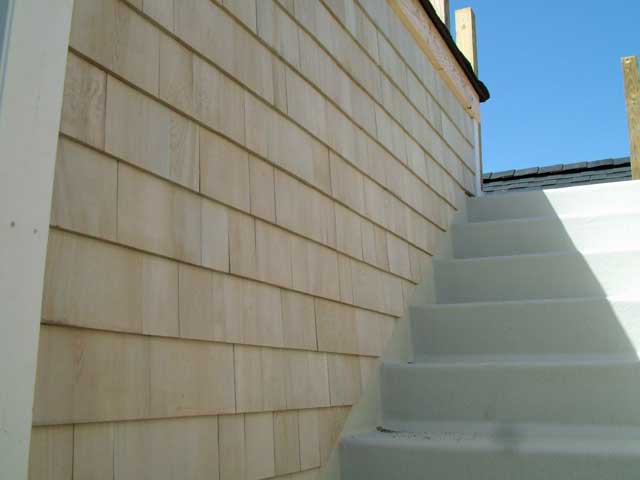
Apr 5. The interior walls of the top deck also get finished with the shingles. |
|
Apr 5. The stairway to the top deck has been sided with the shingles. |
|
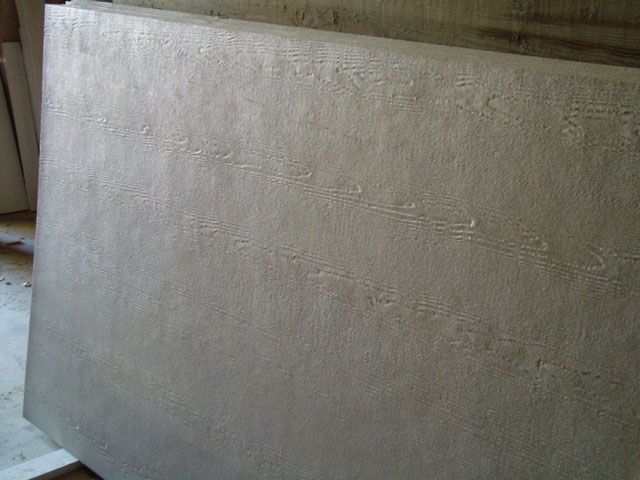
Apr 5. This is a close-up of one of the Hardipanel cement board panels showing the "Cedar Mill" impression pattern. |
|
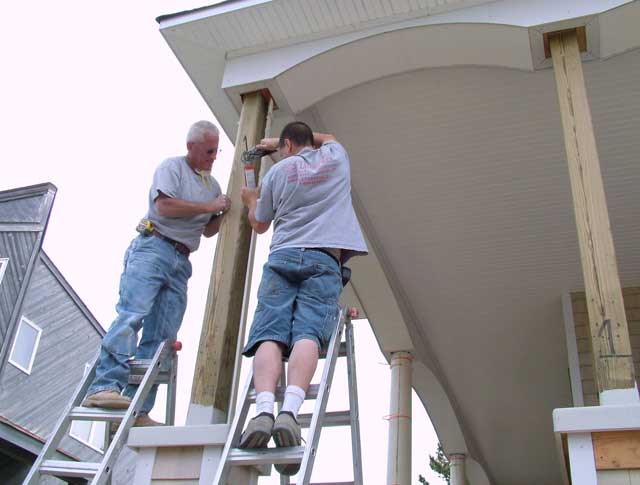
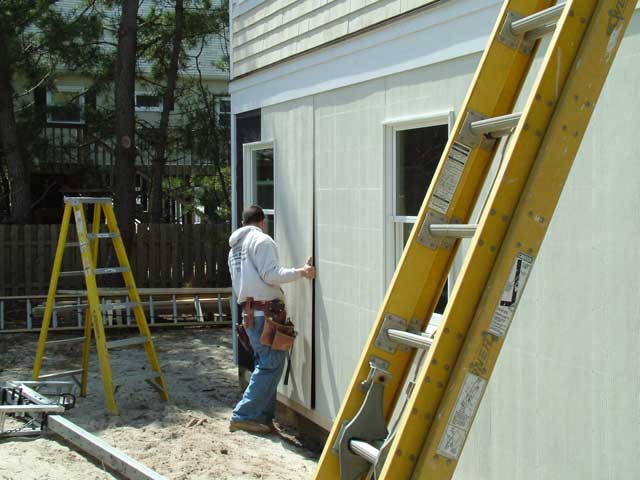
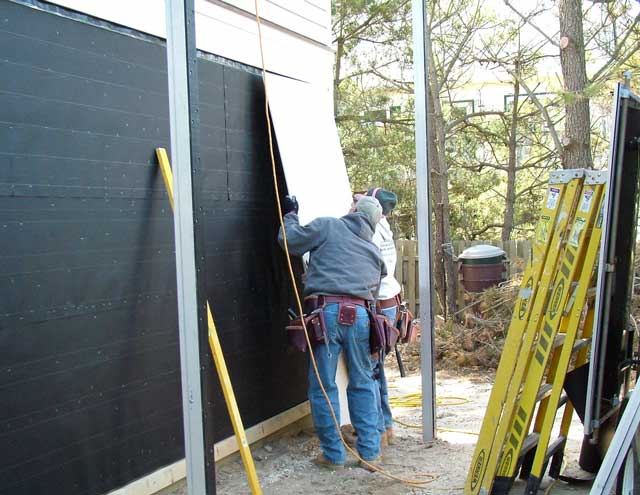
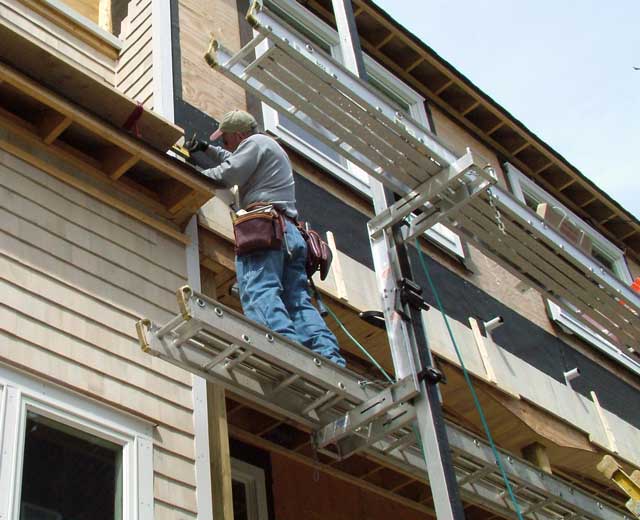
Apr 5. Jeff and his dad cut the panels out front then maneuver them into place. They then snap chalk lines on the panels to place nails in aligned rows. |
|
Apr 5. The lower level exterior is being covered with 4x8 cement board panels. The electric meter box is also in place (middle of picture). |
|
Mar 30. Meanwhile, Jeff's dad is working from the scaffolds over the entry. |
|
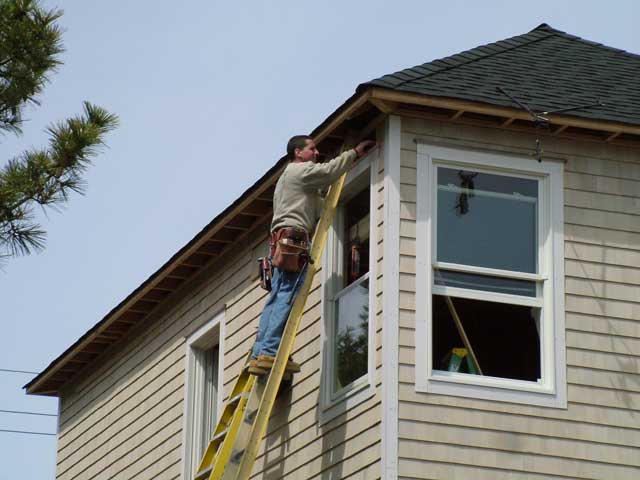
Mar 30. Jeff is working on the shingles under the rear sofit. It's great to be outside after all the rain. |
|
Mar 30. After a week of bad weather, including yet another nor'easter, work resumes on the shingles. We have 4 sets of hands on it today. |
|
Mar 22. The upper deck is being wired for the footlight sconces. These deck walls will be sided with the cedar shingles. |
|
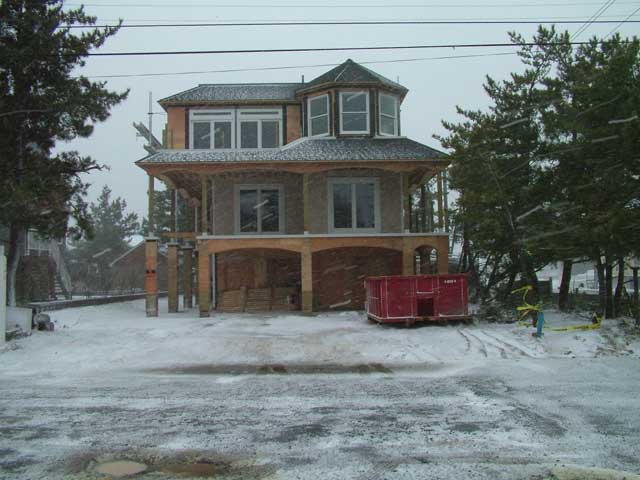
Mar 8. Winter returns with a vengence. Sudden, blizzard-like conditions put a abrupt end to our exterior work. |
|
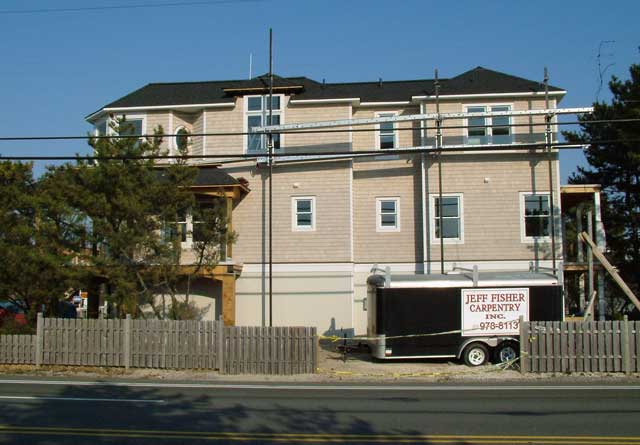
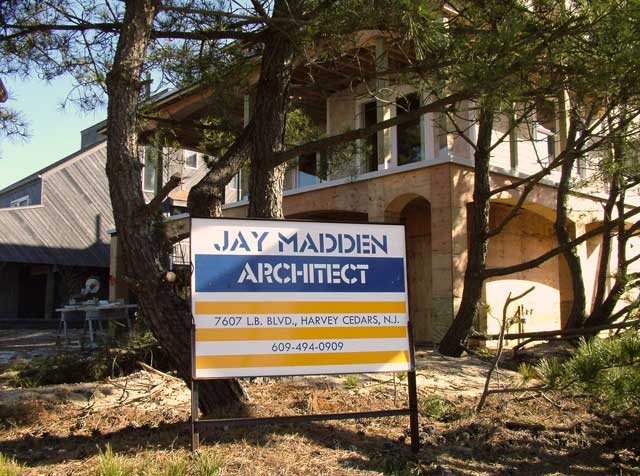
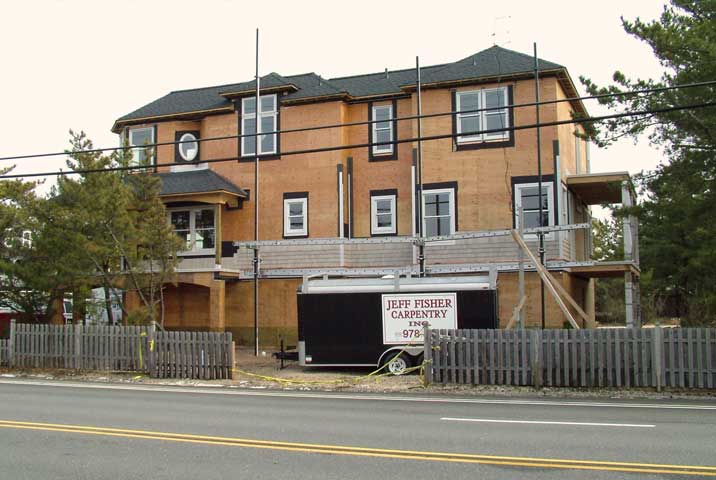
Mar 7. Today Jay Madden finally graced the jobsite with one of his signs. I'm relieved. I was beginning to wonder if we had screwed up the project. |
|
Mar 7. Meanwhile, the east side gets a lot of attention. The cement board trim continues to be controversial among the crew. |
|
Mar 7. The brutal wind has died down, at least for today. Roger nears completion of the west side shingles. |
|
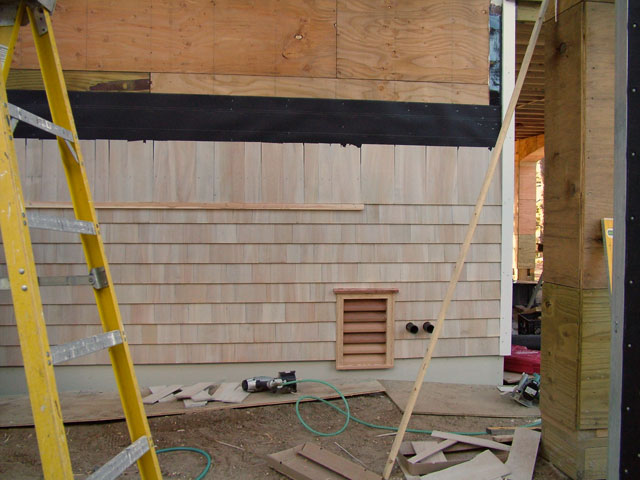
Mar 3. Since the flood vents are now required by code to be so large, it's good that we could use cedar louvers, like this one. Next to it are the discharges from the front deck drains |
|
Mar 3. While it has been too windy to be out on the scaffolds, shingles have been applied around the first floor front deck. |
|
Feb. 23. Oh, boy. This is looking good. |
|
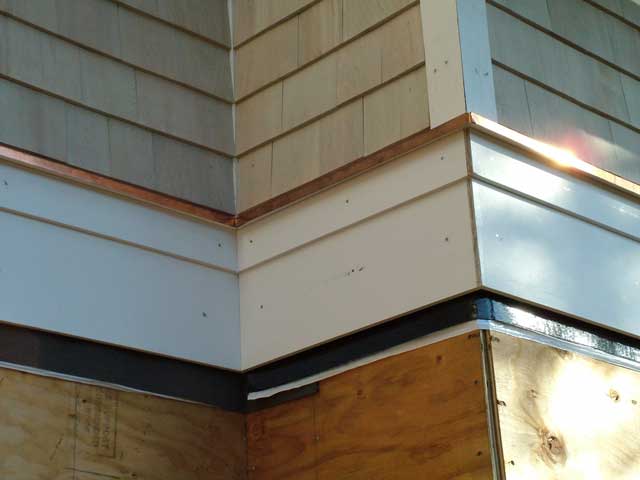
Feb. 23. Here is a closer look at the copper flashing- under the shingles and over the cement board fascia. |
|
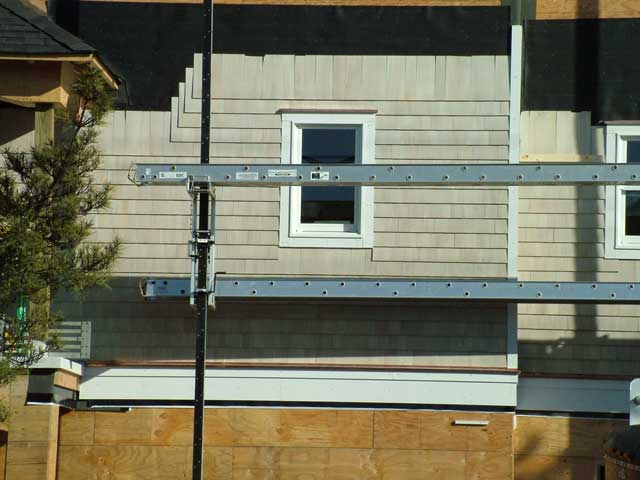
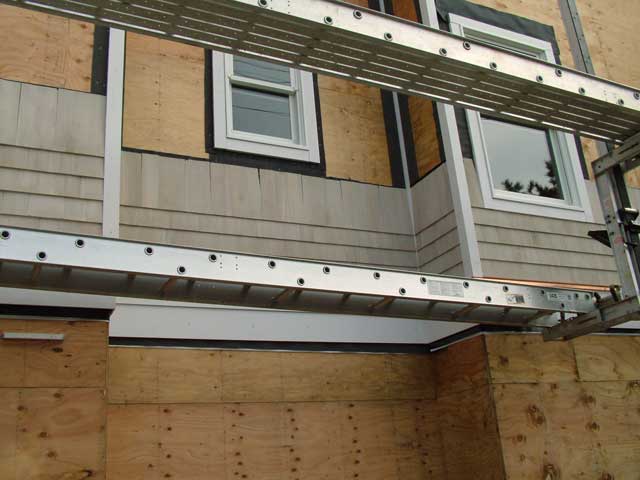
Feb. 21. The west side now has all of its windows and about 8 courses of shingles. |
|
Feb. 21. The shingles are white cedar, native to the northeast. They are pretreated with bleaching oil. See "White vs. Red Cedar." |
|
Feb. 21. The first few courses of the shingles are up on the west and south sides. The 5-1/2" exposure makes for nice, tight lines. Note copper flashing. |
|
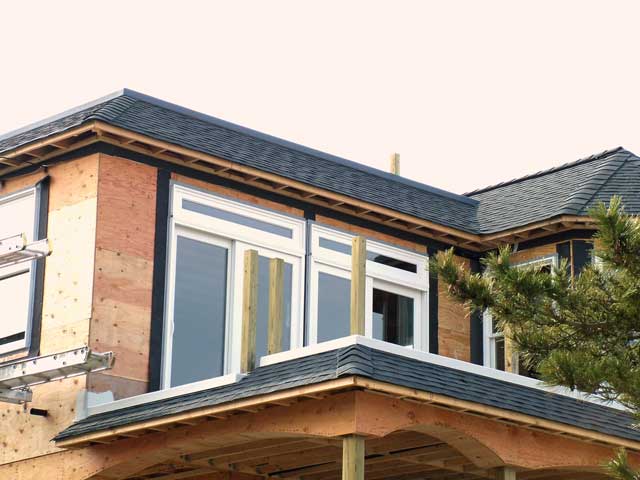
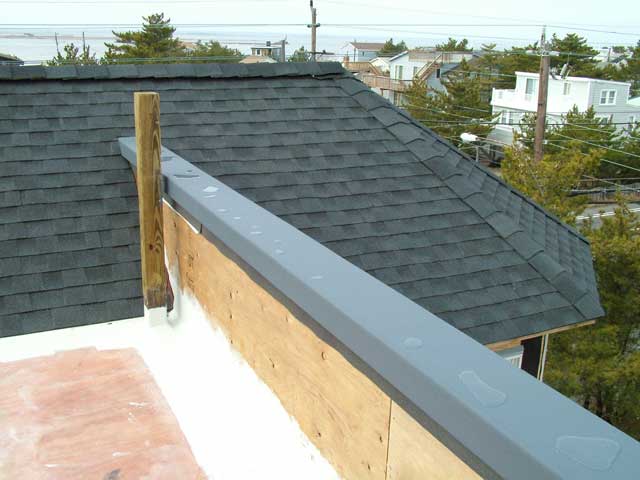
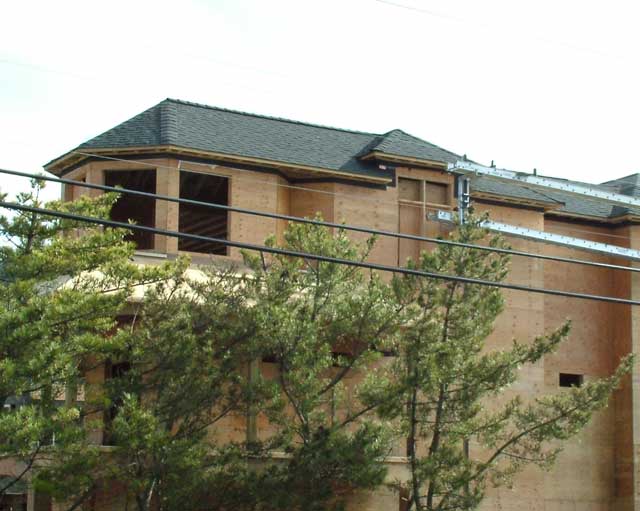
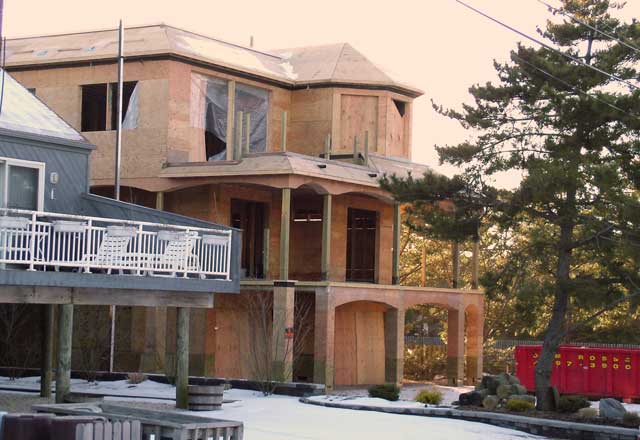
Feb. 21. The roof top deck rim almost diappears when viewed from ground level. This is the look I wanted. |
|
Feb. 21. The fiberglass subcontractor was able to tint the fiberglass Gelcoat for the roof top deck rim to match the roof shingles, like I wanted. Great job! |
|
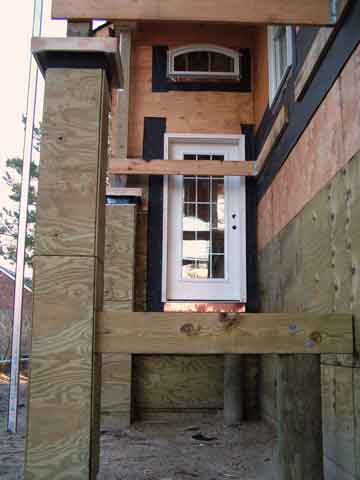
Feb. 16. Exterior doors here must be hurricane-rated. This is the 15-light fiberglass Masonite Artek entry door. The Anderson alternative lacks real entry hardware and paintability, plus it would have cost twice as much! |
|
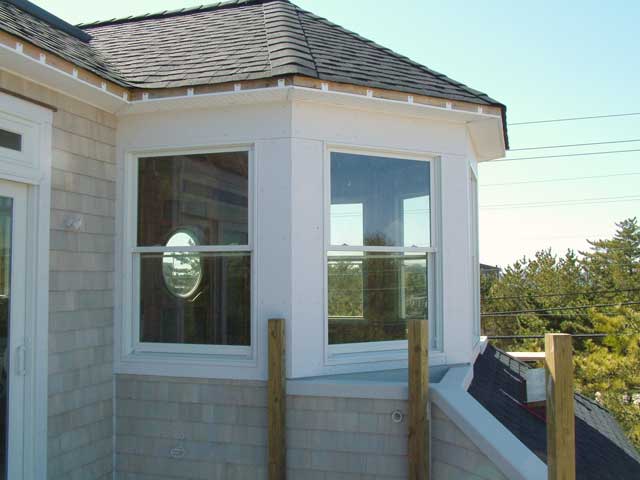
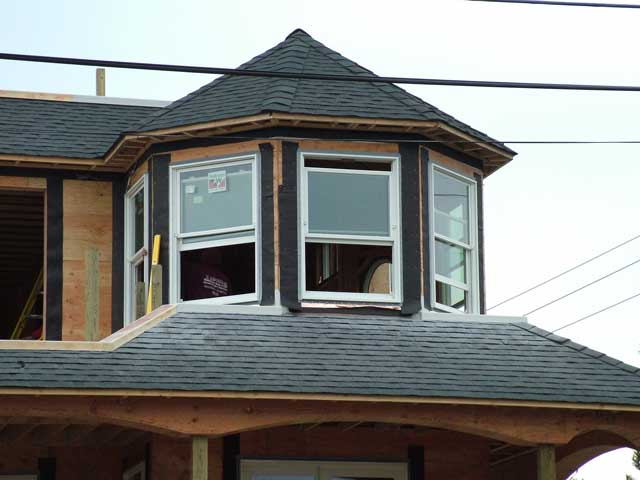
Feb. 16. Closer view of the new turret windows. |
|
Feb. 16. The windows are being installed in the turret. |
|
Feb. 16. All windows on the rear and east sides are in. |
|
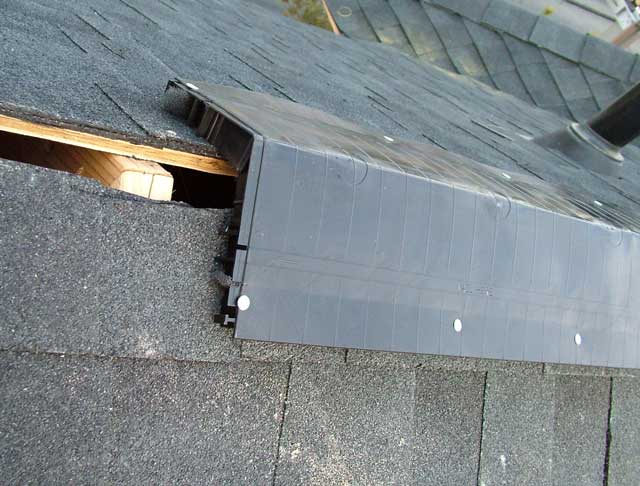
Feb. 9. This is a close-up of the ABS ridge vent. It's a new item. |
|
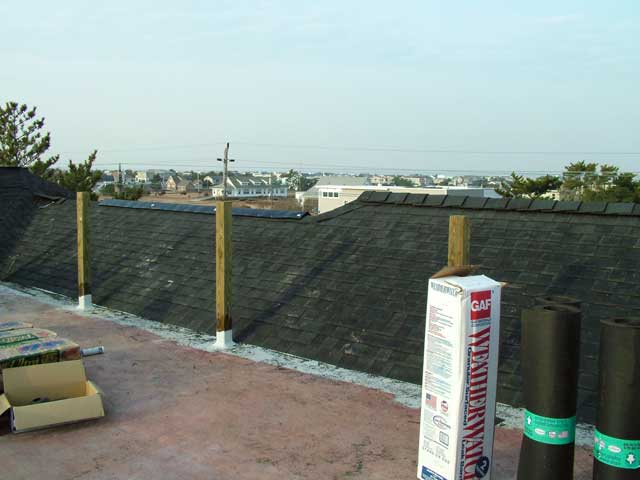
Feb. 9. From the rooftop deck the shingles are easier to see. |
|
Feb. 8. The asphalt shingles have been added to the roof. The lower "penny roofs" are still bare. |
|
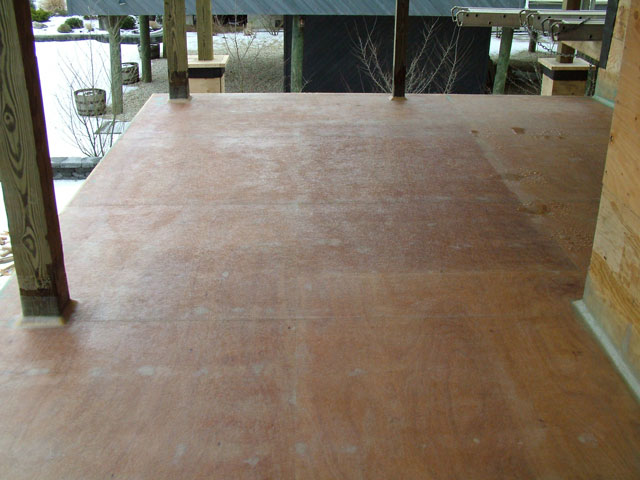
Feb. 8. The second floor rear deck is ready for fiberglass. |
|
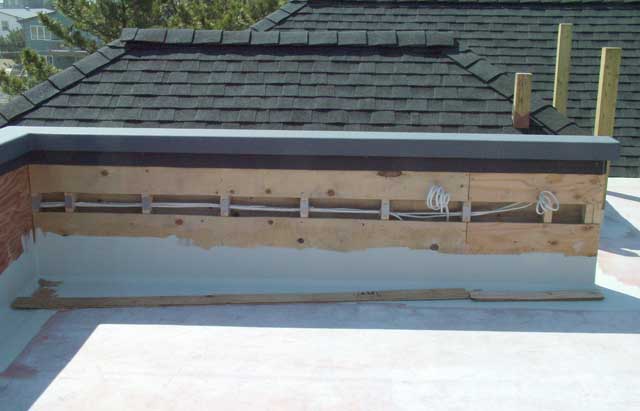
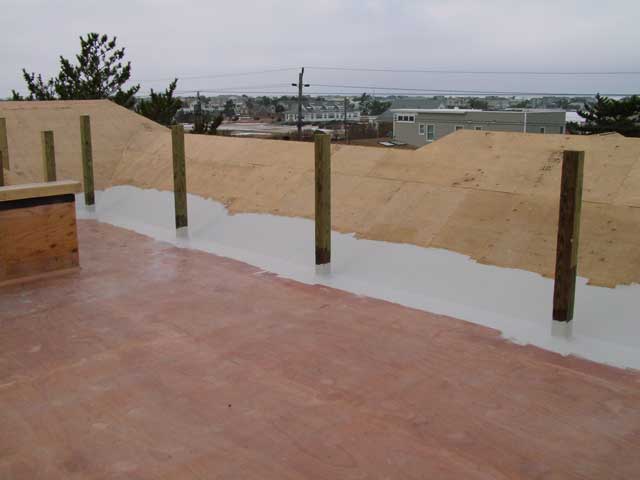
Feb. 3. The top deck is the largest part of the fiberglass job. The vertical posts are for anchoring the future composite railing. |
|
Feb. 3. The rails and deck are fiberglassed on the roof. The gray "gelcoat" finish has been applied in areas adjacent to where roof shingles will be. |
|
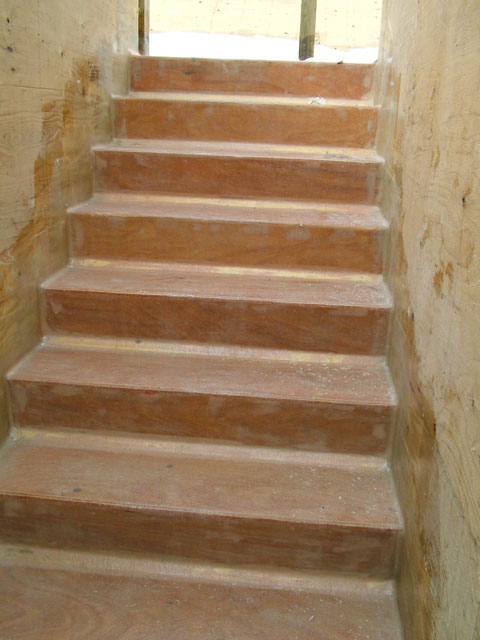
Feb. 3. The stairs to the rooftop deck will face the worst of the weather for many years. The fiberglass has already been cast here. |
|
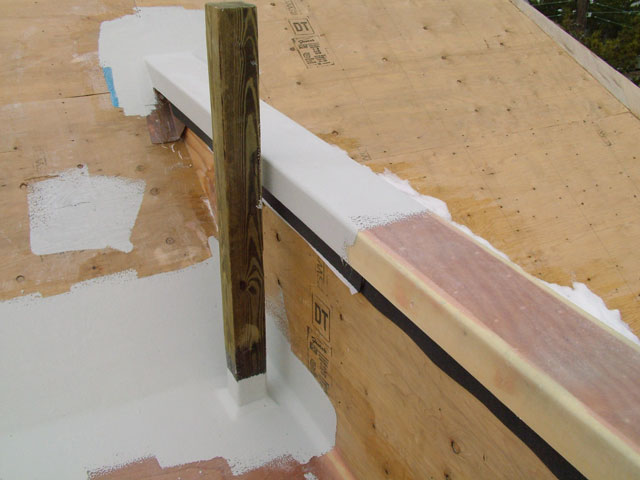
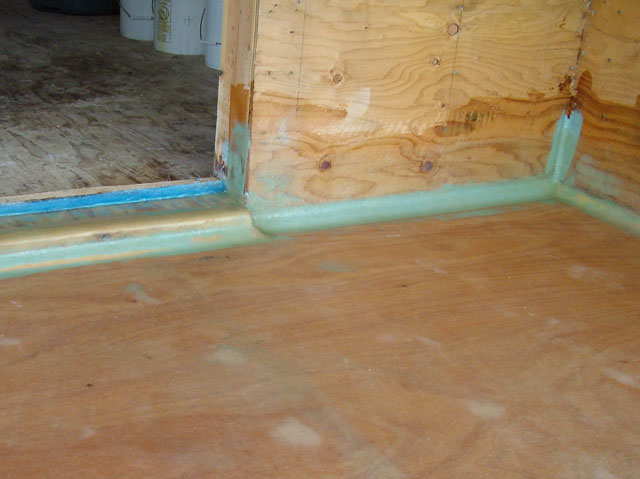
Feb. 3. Close up, the inside corners on the deck have fillets of fiberglass. The fillets will resist cracking, a common problem. |
|
Feb. 3. This is the fiberglass casting on one of the decks. It is transparent and looks like a covering of ice at this stage. |
|
Feb. 2, 2005. The temperatures have been extremely low for weeks. The fiberglass casting of the decks is started during a few pauses in the big freeze. |